| Robot Butcher | |
|---|---|
| Mod | BuildCraft |
| Type | Machine |
The Robot Butcher is a Robot added by the mod BuildCraft. It has the special ability to use Swords and kill passive mobs, though it will not pick up any dropped items (a Robot Picker is suggested to pick and store these items). It will not distinguish between young and adult animals.
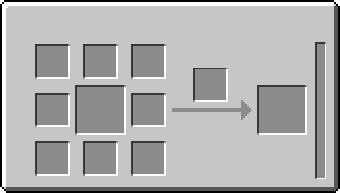
Recipe[]
Usage[]
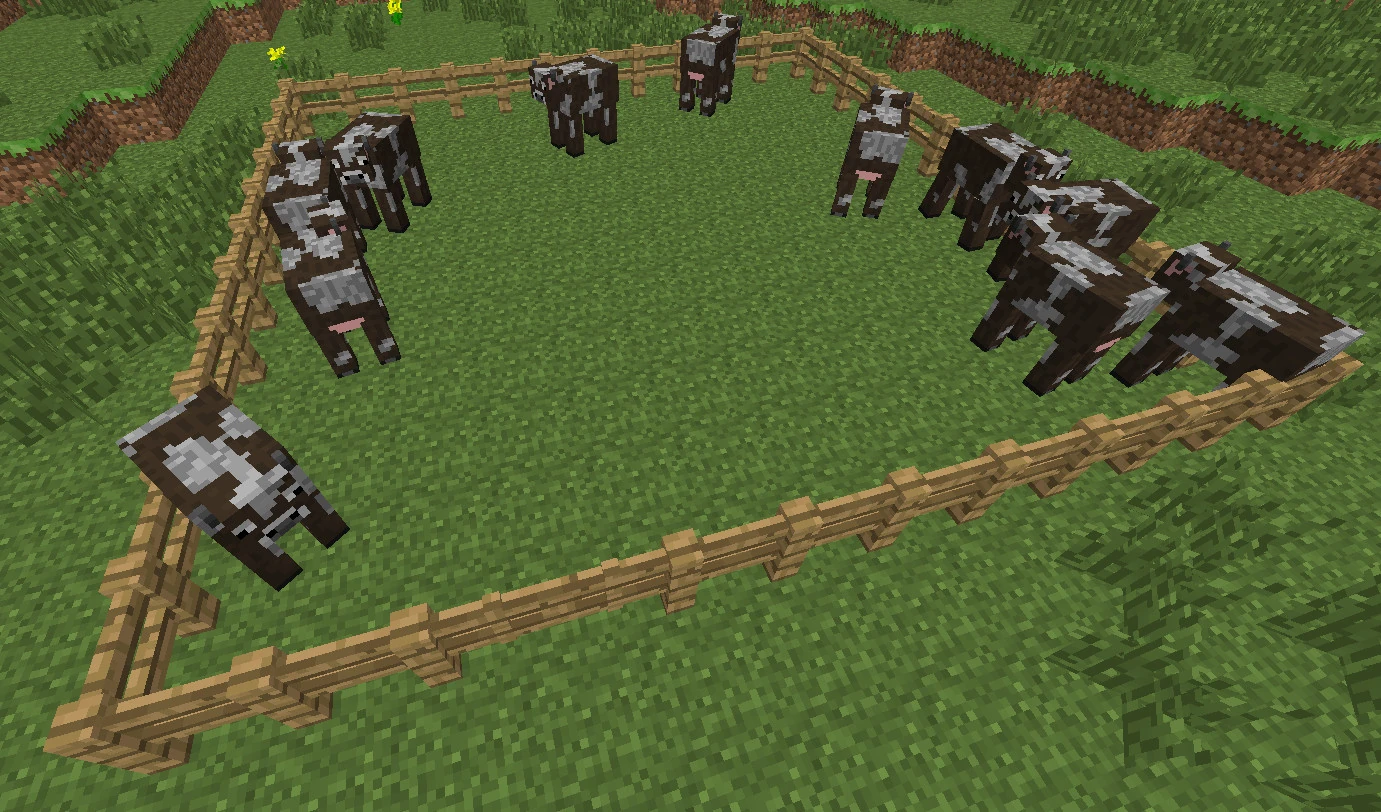

Fig. 1: Fenced cows as an example.
Setting up a Robot Butcher's work zone is described below, using Fig. 1 as an example.
Needed Items:[]
- 3
Land Marks - 1
Chest - 1
Wooden Transport Pipe - 1
Docking Station - 1
Emerald AND Gate (or a other type of Emerald Gate if special functions needed) - 1
Lever - 1
Map Location - 1 or more Swords of any type
- 1
Robot Butcher
Step 1: Define Work Zone[]


Fig. 2: 2-dimensional ground zone defined with three Land Marks
The player must first define the work zone of the robot. This is achieved with Land Marks. If the player doesn't define and configure a work zone for the robot in Step 3, the robot will fly around to every active chunk in the world killing every animal it encounters including Horses, Ocelots and Wolves.
Place three Land Marks such that they create a 90° angle, which defines the base of the cowshed. Right-click on one of the marks to display the red borders (shown in Fig. 2) which show the ground area of the work zone. The two marks on the left and right in the picture may not be more than 64 blocks away from the center mark.
If the operating area isn't flat, the player must place a fourth Land Mark above the central basal Mark up to the height where the Robot is allowed to operate. Right-click on any Land Mark and red borders will appear framing a 3-dimensional work zone. If no red border appears then the basal Land Marks are not creating a 90° angle.
Step 2: Control Station[]
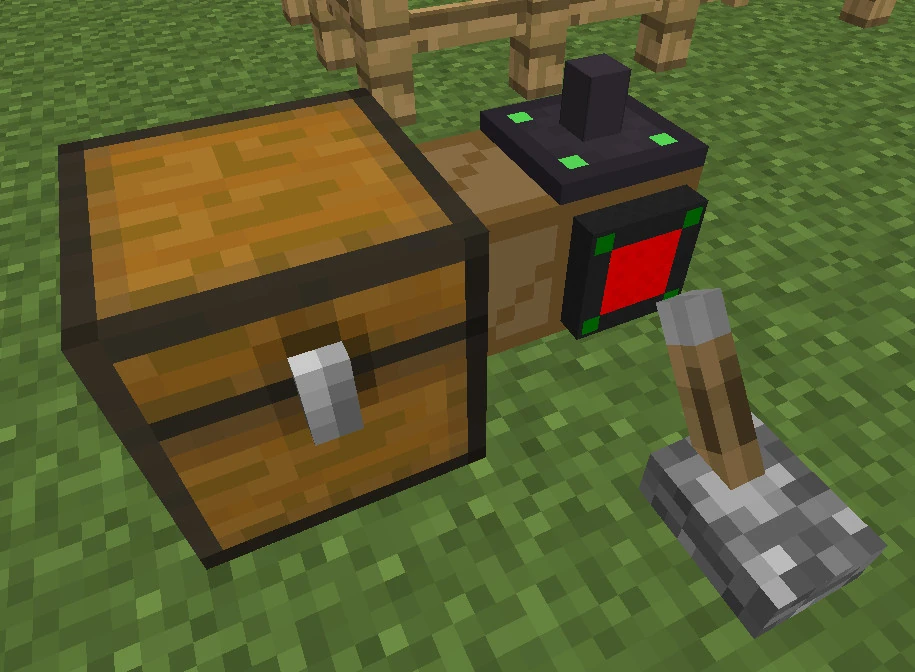

Fig. 3: Control station
A control station for the Robot must be built. It can be placed anywhere but it is recommend to place it close to the work zone for easier access. The following described control station is the simplest setup.
The station includes a Chest with a connected Wooden Transport Pipe, as well as a Docking Station and an Emerald AND Gate which can be placed anywhere on the Pipe without disconnecting the Chest.
Place the Lever in front of the Gate and Swords in the Chest. The station should look like the example in Fig. 3.
Step 3: Configuration[]
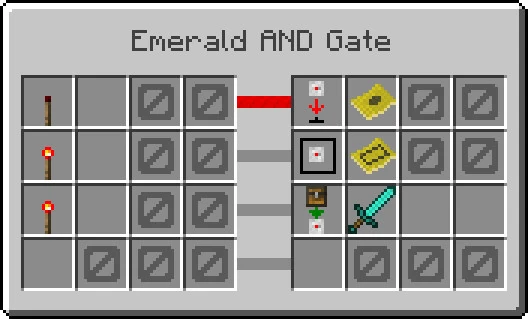

Fig. 4: Programmed Emerald AND Gate

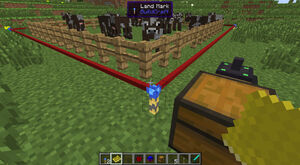
Fig. 5: Receive coordinates from a Land Mark by right-clicking with a Map Location
The Emerald Gate must be configured to control the robot. The example provided is one of many possible setups.
Open the Emerald Gate's GUI by right-clicking, which will show two 4x4 multi-slot fields on the left and right.
Add items as shown in Fig. 4. In the first and third row on the right side are
will appear signalling that an item is required.
The important configurations to control the robot (shown in Fig. 4) are explained in the following:
| Left slot | Right slot | |||||
| Row | Icon | Explanation | do following | Icon | Icon | Explanation |
| 3 | If no redstone signal is provided to the gate | >>> | Go to station => station undefined | |||
| Go to station => coordinates of the station | ||||||
| 1 | If a redstone signal is provided to the gate | >>> | Work in the work zone => work zone undefined | |||
| Work in the work zone => coordinates of the zone | ||||||
| 2 | If a redstone signal is provided to the gate | >>> | Provide Items => item not defined | |||
| Provide Items => Diamond Sword | ||||||
A full explanation of all possible functions can be found in the Emerald Gate article.
The sequence of rows does not matter.
The option previously required coordinates which must be added by the Map Location.
- Take the Map Location and right-click on one of the Land Marks to receive the coordinates of the work zone (shown in Fig. 5). The Map Location will now have a rectangle on its icon. Place it in the
in the second row ("Working area" option) of the Emerald Gate's GUI. The coordinates will be stored and the Map Location can be reused for the second coordinates. - Take the Map Location again and right-click on the Docking Station to receive the coordinates. Note: It is important which side is indicated at the coordinates for the Docking Station. This is displayed in the player inventory if the cursor hovers over the Map Location. Check that the specified side is the same as the Docking Station's (e.g., "UP" if the Docking Station is on top of the pipe). Place the Map Location in the GUI of the Emerald Gate in the
in the first row ("Go to station" option). - Put any Sword in one of the empty slots in the third row on the right side.
The configuration should resemble Fig. 4's and the control station will be fully configured. The Land Marks and the respective frame are no longer needed and can be removed. If the player wants to use the frame for other robots (e.g., the Robot Picker, make sure that the coordinates are stored in a Map Location.
Step 4: Starting and stopping[]
Place the Robot Butcher on top of the Docking Station (shown in Fig. 6). The robot will initially do nothing because the logic statement in the first row instructs the robot to stay on the Docking Station when no redstone signal is provided.
Switching the Lever in front of the gate to provide a redstone signal to the gate will activate the second and third logic statements.
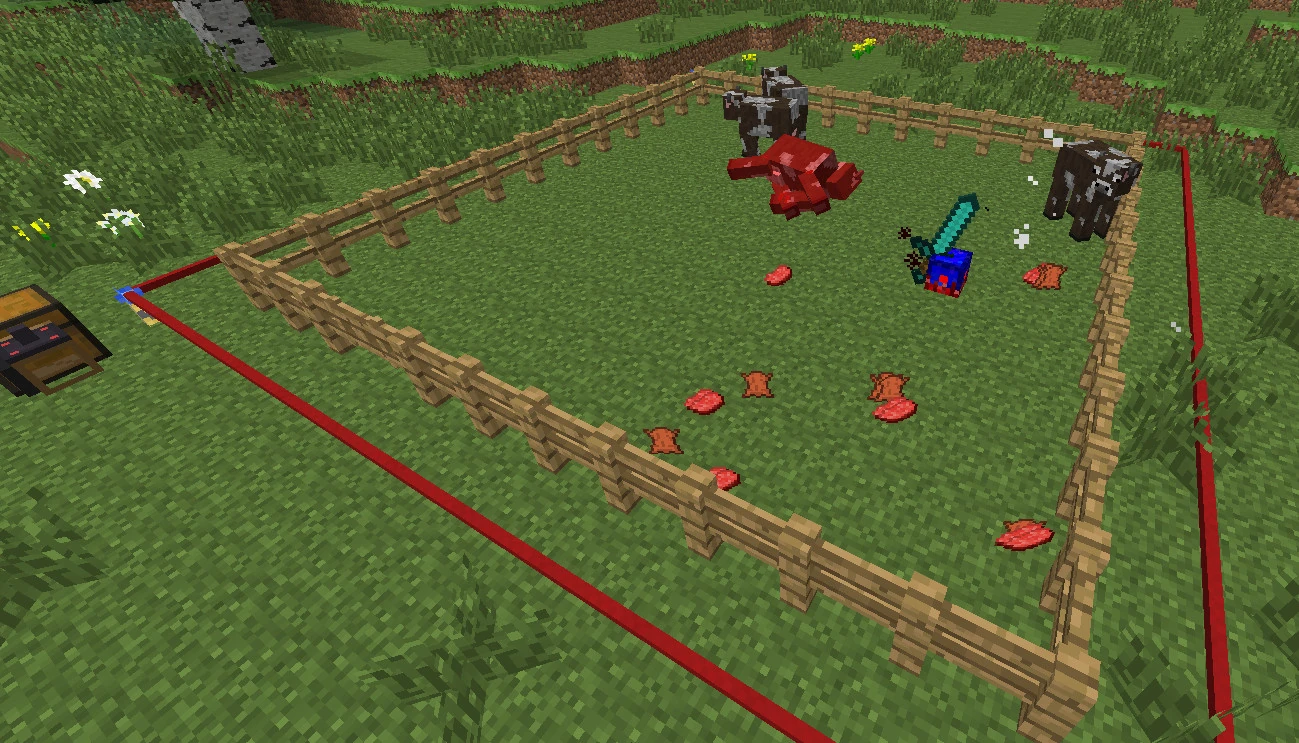
After a short time (the update time of the robot), the robot will take a Sword out of the chest (third logic statement in the Emerald Gate) and start work in the work zone (second logic statement in the Emerald Gate) (shown in Fig. 7) until there are no animals in the zone anymore.
When the Sword breaks the Butcher will return to the Docking Station to acquire a new Sword (if any) from the Chest before resuming work.
When all animals are killed in the defined working area, the robot will automatically return to the Docking Station but will remain active. It will resume working when a new animal enters the work zone. The work of the robot can be stopped anytime by switching the Lever (in front of the Gate) off,causing it to return to the Docking Station and becoming inactive.

Fig. 7: Finished control station with robot.

Fig. 8: Lever switched and robot work.

Recharging[]
If the robot is low on energy it will begin to seek out a kinesis pipe with a Docking Station to charge itself. If none are available, it will continue doing its job until its battery dies. The player can also stop the robot with attacks to prematurely drain its battery, causing the robot to drop as an item on the ground. Stronger attacks will drain its battery faster. The player can pick up the robot and place it in the Charging Table to recharge it. After that, the robot can be placed again on the Docking Station to resume work.
Notes[]
- After programming the frame created with the Land Marks is not required as the coordinates of the working area are saved in the Emerald Gate.
- The Butcher will not distinguish between young and adult animals.
| |||||||||||||||||||||||||||||||||||||||||||||||||||||||||||||||||||||||||||||||||||||||||||||||||||